

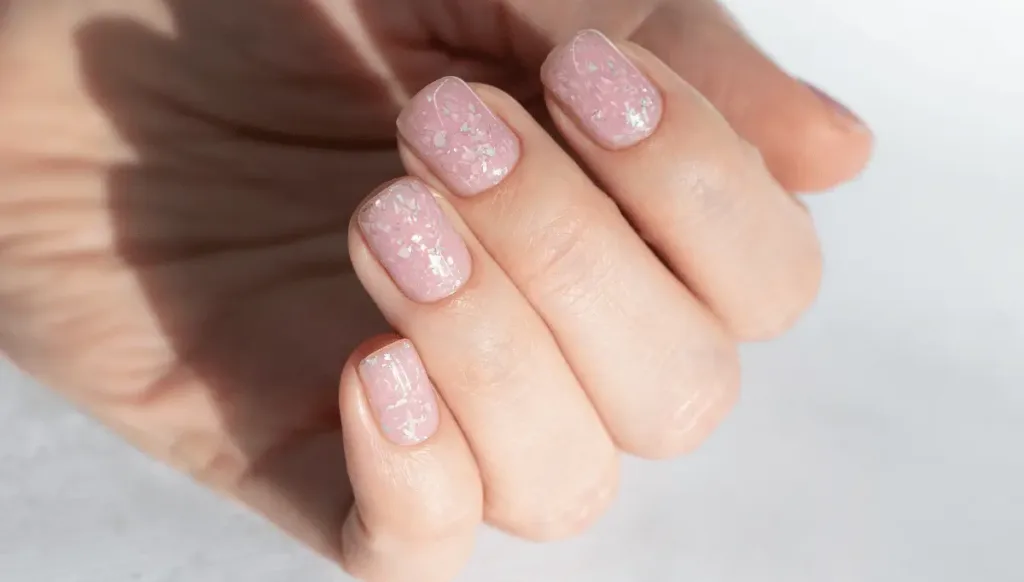
We’ve all been there, you’ve just spent a good chunk of time carefully applying your gel nail polish, only to find it feels sticky even after curing. It’s a puzzling and often frustrating experience.
From my experience as a nail tech, the reason your gel nails are sticky after curing is often due to the inhibition layer or tacky layer that forms during the curing process. This is a typical outcome and is simply a residue of uncured gel polish that sits on the top layer of your manicure.
The inhibition layer is intentionally left uncured so the next layer of gel adheres better. To remove this stickiness, you typically wipe your nails with a lint-free wipe soaked in 99% isopropyl alcohol after the final curing. Make sure to cure for the right time and use products that work well together to prevent other problems.
This blog post will explain the reasons behind sticky gel nails post-curing and offer solutions to ensure your next gel manicure is nothing short of perfection.
Should I Worry about Post Cure Sticky Gel Nails?
No, you shouldn’t worry about sticky gel nails after curing, just wipe it off with isopropyl alcohol after final curing. This stickiness is a normal part of the gel nail process, resulting from the inhibition or tacky layer.
This layer is a residue of uncured gel polish on the top of your manicure to make the layers of gel stick better. As long as you follow proper application and curing procedures, and use compatible products, the stickiness won’t indicate any issue with the health or quality of your manicure.
5 Reasons Why Gel Nails Become Sticky After Curing
Here are some of the primary reasons why gel nails can become sticky after curing.
1. The inhibition layer
After curing gel polish under a UV or LED lamp, it’s not uncommon for the surface to be slightly tacky. This tackiness is often referred to as the “inhibition layer” or “dispersion layer.” It’s a byproduct of the curing process, caused by uncured gel molecules that rise to the surface of the polish during exposure to the UV or LED light. This layer is standard, and it’s designed to be wiped away with a specific cleanser or isopropyl alcohol after curing.
2. Insufficient curing time
One of the primary reasons gel nails remain sticky post-curing is not allowing the polish to cure long enough under the lamp. Each gel polish brand and color may have slightly different curing times, and not adhering to these can result in a tacky finish. It’s essential to consult the manufacturer’s guidelines for the exact time required.
3. Gel polish applied too thickly
If the gel polish is applied in layers that are too thick, it might not cure correctly, leaving certain areas sticky and others fully set. As a rule of thumb, multiple thin layers, each cured separately, are better than a single thick layer.
4. Lamp incompatibility or malfunction
Sometimes, the issue might be with the UV or LED lamp itself. Not all gel polishes are compatible with all lamps. Some polishes might require UV light, while others need LED. Moreover, if the lamp’s bulbs are old or malfunctioning, they might not provide the necessary light intensity for proper curing.
5. Product expiry or contamination
Gel polishes, like all beauty products, have a shelf life. Using expired products or those that have been contaminated (e.g., by being left open) can impact the curing process, leading to stickiness. It’s crucial to ensure that the polish is in good condition and stored correctly.
Step-by-Step Guide to Fix Sticky Gel Nails
Below is how to remedy the issue of sticky gel nails:
1. Assess the situation
Before taking any corrective action, it’s essential to determine the cause of the stickiness. Check if the gel polish was applied too thickly, if the UV/LED lamp is functioning properly, or if the curing time was insufficient. This assessment will help in ensuring you don’t repeat the same mistake in the future.
2. Cleanse the tacky layer
The easiest solution to sticky gel nails is to remove the inhibition layer. To do this, dampen a lint-free wipe with 99% isopropyl alcohol. Gently and thoroughly wipe each nail, ensuring you remove all the tacky residue. This step will not only remove the stickiness but also give your nails a high-gloss shine.
3. Reapply and cure
If the stickiness is due to incomplete curing or an overly thick application, you might need to reapply a thin layer of the gel polish. Once you’ve reapplied, ensure you cure the nails under the UV/LED lamp for the recommended time. Remember, multiple thin coats are better than a single thick one.
4. Opt for a top coat
Another effective method to combat sticky gel nails is to apply a gel top coat. This layer acts as a sealant, ensuring the underlying layers are protected. After applying the top coat, cure it under the lamp. Then, use the isopropyl alcohol and lint-free wipe method to remove any remaining tackiness.
5. Check your products
Always ensure your gel polishes, base coats, and top coats are compatible. Mixing brands or using outdated products can sometimes lead to curing issues. If you’re consistently facing the sticky nail issue, consider investing in a new gel polish brand or upgrading your UV/LED lamp.
Conclusion
Gel nails offer a durable and glossy finish that many adore. However, experiencing stickiness after curing can be a concern for some. By understanding the reasons behind this issue, from the natural inhibition layer to lamp malfunctions or improper application, individuals can take proactive measures to address and prevent it.
As with many beauty and self-care procedures, the key to perfect gel nails lies in adhering to best practices, using quality products, and being informed. With the right knowledge and tools at one’s disposal, achieving that flawless gel manicure is within reach.


